You've been visiting computer stores. You've been browsing online stores. But you still haven't quite found the gaming keyboard of your dreams.
Well, have you ever thought about creating your own custom mechanical keyboard? Think about the satisfaction of gaming and typing on a device in which you chose each part. The keyboard is perfectly aligned with your gaming and typing preferences.
It's not just about having a customized keyboard. Undertaking a DIY project like this could be an extremely fulfilling endeavor, something that you can be proud of. Who knows? You may take up keyboard modding as a passion or even as a paid service (i.e., creating custom keyboards for clients).
Let's talk about building your dream keyboard.
Why Build a Mechanical Keyboard Yourself?
Come to think of it, it's a logical question. Why would you build a gaming keyboard when you can just buy one in the market? That would be easier, right?
Well, let's call it passion. For keyboard modders, some things make building your keyboard a vastly better endeavor than just grabbing one on the shelves.
1. Customization: Building a keyboard means that you are building something truly unique. It's a kind of self-expression. DIY-ing your own keyboard involves creating unique visual designs, from custom keycaps and cases to lighting and cables. It doesn't stop with aesthetics either. Custom firmware helps you to personalize key mapping, macros, and layers.
2. Typing Experience: Through modding, you can fine-tune the acoustics of the keyboard by changing cases, plates, and sound-dampening materials. You can also choose from various switch types (linear, tactile, clicky) for that perfect typing feel with each key press.
3. Learning and Skill Development: Building your own keyboard involves learning soldering, wiring, and programming, which boosts your technical knowledge. It even fires up your imagination since selecting designs and experimenting with layouts nurture creativity.
4. Satisfaction and Pride: Do you remember how proud you were when you showed off the scale model you've assembled or that sculpture you carved yourself? Successfully completing a custom keyboard project provides a sense of accomplishment. The keyboard becomes a one-of-a-kind device tailored specifically to your needs and style.
5. Experimentation: If you love learning electronics and technical stuff, then building a DIY keyboard is for you. Keyboard modders and enthusiasts love exploring emerging trends such as new switch types, layouts, and materials. Modding different layouts and designs allows you to experiment with various builds.
DIY Keyboard Kits
If you're new to making keyboard projects, your best and most convenient bet is to buy a DIY keyboard kit. These kits are widely available for both beginners and experienced builders. They often include the essential components needed to assemble a custom keyboard. Here's what you can expect from DIY keyboard kits:
1. Contents
PCB (Printed Circuit Board): The core of the keyboard where all switches are soldered or connected
Case: A frame made of plastic, aluminum, or other materials to house the PCB and components
Plate: A metal or plastic plate that holds the switches securely over the PCB
Stabilizers: Used to stabilize larger keys like the spacebar, enter, and shift keys
Cables: A USB cable or connection cable compatible with the PCB
Firmware Support: Information or software tools for programming the keyboard's firmware
2. Optionals
Switches: Some kits come with switches. Others don't; you have to buy the key switches separately.
Keycaps: Most kits do not include keycaps.
Additional Features: RGB lighting, hot-swappable switch sockets, or wireless modules may also be included.
3. Types of Kits
Full Kits: A full DIY keyboard kit contains everything needed for assembly including switches and keycaps.
Barebones Kits: A barebones kit includes the PCB, case, and plate but lacks switches and keycaps.
Hot-Swappable Kits: These kits have hot-swappable sockets for switches, removing the need to solder the switches to the PCB
4. Popular Layouts
60%, 65%, and 75% Kits: These smaller keyboards do not include dedicated function or number keys.
Tenkeyless Kits: TKL kits exclude the number pad but retain the rest of the standard layout.
Full-Size Kits: This is your standard keyboard layout. They include the entire 104-key standard layout with a number pad.
5. Sources
Enthusiast Stores: Many specialized stores sell DIY keyboard kits. Their main market includes keyboard hobbyists, enthusiasts, and gamers.
Crowdfunding Campaigns: Some innovative designs are launched through crowdfunding platforms before being available widely.
Forums and Groups: Community-driven initiatives often promote unique or niche keyboard kits.
These kits are a great starting point if you're interested in customizing or building your own mechanical keyboard. Of course, you can purchase each component separately, but that would entail a deeper understanding of the technical aspects and electronics of computer peripherals.
Choosing the Right Components for Your Build
Successfully building a DIY mechanical gaming keyboard starts with choosing the right components for your project. Here's a simple but effective checklist for approaching each essential component:
1. PCB (Printed Circuit Board)
Compatibility: Choose a PCB that matches the layout you want (e.g., 60%, TKL, full-size).
Features: Look for features such as hot-swappable switches, per-key RGB lighting, or QMK/VIA firmware support.
Connection: Consider USB-C vs. micro-USB and wired vs. wireless.
2. Case
Material: Choose the case material. Aluminum is sturdy, plastic is lightweight, and acrylic can be see-through for RGB effects.
Mounting Style: Choose whether you want a top mount (plate attached to the case top), tray mount (PCB attached to the bottom of the case), or gasket mount (flexible for typing feel).
3. Plate
Material Choice: Metal plates are rigid and durable. Polycarbonate plates are softer. Carbon fiber plates balance flexibility and durability.
Layout: Make sure the plate matches the PCB layout to avoid incompatible key placements.
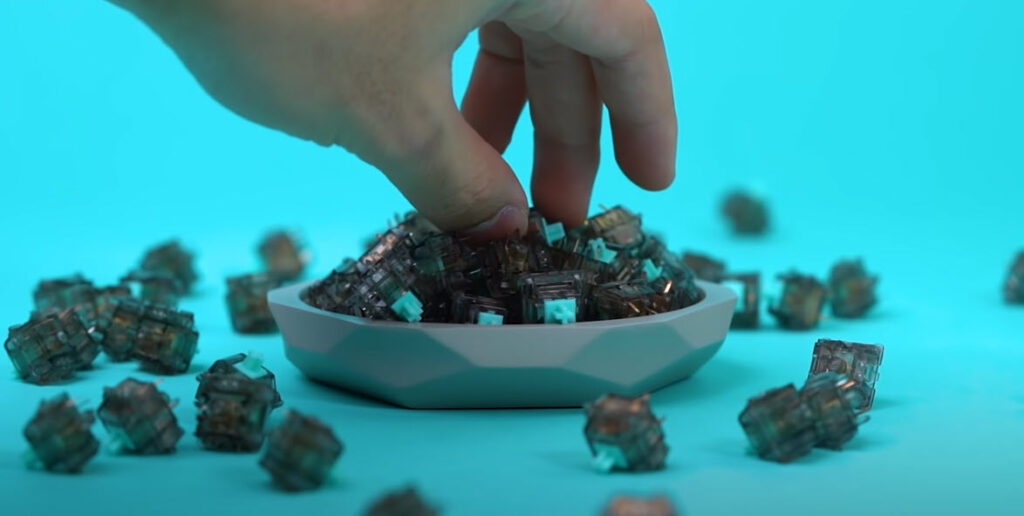
4. Switches
Type: Select the switches based on your desired actuation—linear (smooth), tactile (slight bump), or clicky (bump with audible click).
Customization: We suggest getting pre-lubed switches for a smoother feel when typing. You can also manually lube your switches as part of regular maintenance. Different spring weights also affect the key press.
5. Keycaps
Profile: Decide which profile feels comfortable (e.g., Cherry, SA, DSA).
Material: PBT is durable and retains its matt surface. ABS keycaps are cheaper but wear faster.
Legends: Consider dye-sublimated or double-shot legends for longer-lasting key legends.
6. Stabilizers
Type: Choose between clip-in, screw-in, or plate-mounted stabilizers. Screw-in stabilizers generally provide better stability.
Lubrication: Lubing stabilizers prevents large keys from rattling when pressed.
7. Firmware
QMK/VIA: For advanced key remapping, macros, and layers, check if your PCB supports open-source firmware such as QMK or VIA.
Alternative Software: Some brands have their own software for customization. Check your kit manufacturer's website.
8. Additional Components
Sound Dampening: Foam layers between the case and PCB or within the case can reduce unwanted noise.
Cable: Custom cables can add flair to your setup, especially coiled or braided ones.
Building and Assembling Your Custom Keyboard
We've come to the exciting part, which is putting together your customized mechanical gaming keyboard. Here's a step-by-step guide to help you build and assemble your custom mechanical keyboard:
1. Preparation
Tools and Supplies: You would need necessary tools like a soldering iron, keycap puller, switch puller, and screwdriver.
PCB Testing: Before assembling, plug in the PCB to ensure it powers on and can detect key presses.
2. Plate and Switch Assembly
Mounting Switches: Insert the switches into the plate; when doing so, make sure the pins align with the PCB. If your plate is integrated into the case, insert the switches directly into the PCB. Be careful not to damage the pins or metal contacts.
Securing Switches: Each switch should be firmly seated on the plate.
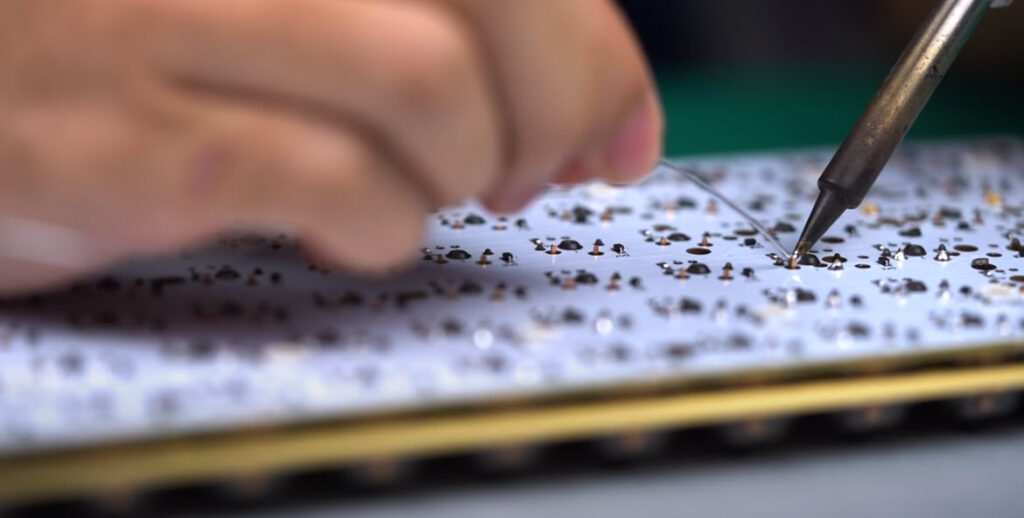
3. Soldering
Heat the Iron: Set the soldering iron to the right temperature (350 to 400°C).
Soldering Process: Apply a small amount of solder to each switch pin. Let it flow to cover the pin securely. Avoid overheating or resting the iron for too long to prevent damaging the PCB.
Check Connections: Check if each switch is securely soldered. Retouch any loose connections.
Hot Swappable: For your first DIY keyboard project,we recommend getting hot-swappable keyboard kits. Sure, they may be more expensive, but you don't need to solder or desolder mechanical key switches.
4. Stabilizers Installation
Preparation: Lubricate stabilizers to reduce noise and friction.
Mounting: Clip, screw, or insert plate-mounted stabilizers securely according to the PCB's layout.
5. Sound Dampening
Foam Layers: Add foam or silicone padding between the PCB and case to minimize hollow sounds.
Switch Dampening: Use o-rings or switch pads for quieter typing.
6. PCB and Case Assembly
Mounting Plate/PCB: Place the assembled PCB (with plate) into the case. Alight it properly with all mounting points.
Securing Screws: Tighten screws into place. Avoid over-tightening to prevent damage.
7. Firmware Programming
Custom Firmware: Use software like QMK Configurator or VIA to program your keyboard layout.
Layers and Macros: Customize key mapping, layers, or macros to suit your needs.
8. Keycap Installation
Install Keycaps: Place each keycap on the correct switch stem. Press down firmly but gently until the cap locks into place.
9. Final Testing
Functionality Test: Test each key to ensure they function as intended.
Stabilizer Check: Press on large keys (enter, space bar, backspace, shift, etc.) to make sure that the stabilizers provide smooth movement without excessive rattling.
Troubleshooting Your DIY Mechanical Keyboard
While building your personalized mechanical keyboard, you might face a few challenges. But don't fret, we're here to guide you through common problem-solving steps to help you navigate through. Here are some common issues with DIY mechanical keyboards:
1. Unresponsive Keys
Cause: Key switches might not be soldered properly. There may be a faulty switch.
Solution: Re-solder the key switch pins to ensure good contact with the PCB. If the switch is still unresponsive, replace it with a new one.
2. Ghosting or Phantom Keypresses
Cause: Firmware misconfiguration or a short circuit in the PCB.
Solution: Re-flash the firmware to restore the default key mappings. Inspect the PCB for shorts, especially around diodes and switches.
3. Multiple Keys Registering at Once
Cause: Solder bridges are short-circuiting switch connections. A solder bridge is an unintended electrical connection between two adjacent conductive elements. This usually occurs when excess solder accidentally joins the contacts.
Solution: Check the PCB under bright light or a magnifying glass for solder bridges. Use a desoldering tool to remove excess solder.
4. Stuck or Misaligned Keycaps
Cause: Keycaps aren't fitting correctly on switch stems or stabilizers.
Solution: Ensure the keycaps are firmly and correctly seated. Adjust the stabilizers and key stems, or replace broken components.
5. Key Chattering (Repeated Inputs)
Cause: Dust or debris inside the switch or unstable firmware.
Solution: Clean the switch or replace it if damaged. Re-flash the keyboard firmware to stabilize the input.
6. Inconsistent Backlighting
Cause: Damaged or misaligned LEDs.
Solution: Check for loose or broken LED connections and re-solder as needed. Replace LEDs if burned out.
7. USB Connection Problems
Cause: Damaged cable, improper connection, or faulty port.
Solution: Test with another cable or USB port. If the problem persists, check the USB connector on the PCB for damage.
8. Erratic Key Behavior on Specific Layers
Cause: Conflicting firmware key mapping or macros.
Solution: Review the key mapping in QMK Configurator, VIA, or other firmware software to resolve conflicts.
9. Sticky or Non-Smooth Key Presses
Cause: Friction or debris inside the switch or between keycap and switch.
Solution: Clean and lubricate the switches and stabilizers. Check if the keycaps are interfering with each other.
10. Case Vibrations or Rattling
Cause: Loose screws, misaligned PCB, or inadequate stabilizers.
Solution: Tighten all screws, secure the PCB firmly, and add sound-dampening foam between the PCB and case.
11. Firmware or Programming Not Working
Cause: Corrupted firmware or software issues.
Solution: Reset or re-flash the firmware using QMK Toolbox or an appropriate software tool. Make sure drivers are up to date.
Conclusion
That sounds exciting, isn't it? Creating your own custom mechanical gaming keyboard is actually crafting a technological work of art. The expense, time, and effort of putting it together---not to mention troubleshooting issues that may arise---is all part of the project. After you successfully build your own gaming keyboard, you'll be using a computer peripheral that works to your every whim. It's a customized device that you'll be proud of.
Chris Greiner, a Mechanical Keyboard specialist, boasts a solid educational background with dual bachelor's degrees in Computer Science and Business Management from Lewis University. His additional certification in Mechanical Keyboard Design showcases his dedication to staying on the forefront of keyboard technology. Chris primarily writes for keyboard enthusiasts and has been featured on platforms like Jestik, solidifying his reputation as a thought leader in the mechanical keyboard community.
Pinstack is a dedicated online media platform focusing on selling and reviewing mechanical keyboards. Our commitment is to provide comprehensive reviews, in-depth guides, and much more. With our active presence on YouTube and our website, we strive to deliver top-quality content across multiple platforms, aiming to bring the best to our audience.
Subscribe to our newsletter
We care about the protection of your data. We’ll never share your details.
Pinstack is an Amazon Affiliate. All earnings from this website are from qualified purchases. Learn more about our affiliate disclosure terms.