Stabilizes are wonderful components that help prevent rattling and uneven key presses. They ensure that larger keys like the spacebar and shift keys respond with the same grace and consistency as the rest. Yet, they are not perfect. They can still rattle, shift, and wobble, the very motions they're designed to prevent.
So, you're fed up with your clunky keyboard. Well, it's time you discover the magic of modding your stabilizers. With our guide, you'll learn how to transform your keyboard using simple Band-Aids. Or simple processes like clipping some of the stem or lubing stabilizers.
We'll guide you through the art of each mod, offering insights, tips, and best practices to ensure your mechanical keyboard becomes a joy to type on.
Understanding Keyboard Stabilizers
You've probably noticed that your larger keys like the spacebar and shift keys don't wobble or rattle when you press them - that's the work of keyboard stabilizers. They're essential for a smooth, consistent typing experience and they come in different types, each with their own unique mechanism.
Before you can begin modding, it's important to understand what these stabilizers are and how they function.
What are Keyboard Stabilizers?
Stabilizers are components that enhance the stability and consistency of keypresses on larger keys such as the spacebar, enter key, shift key, and modifier keys. They are critical for ensuring a uniform typing experience across the keyboard, as these larger keys often require more complex mechanisms to register keystrokes reliably.
Stabilizers serve two primary purposes:
Reducing wobble: On larger keys, stabilizers prevent the keycap from wobbling or tilting when pressed off-center.
Even keypress: They ensure that the keypress actuates consistently regardless of where the keycap is pressed.
Different Types of Stabilizers
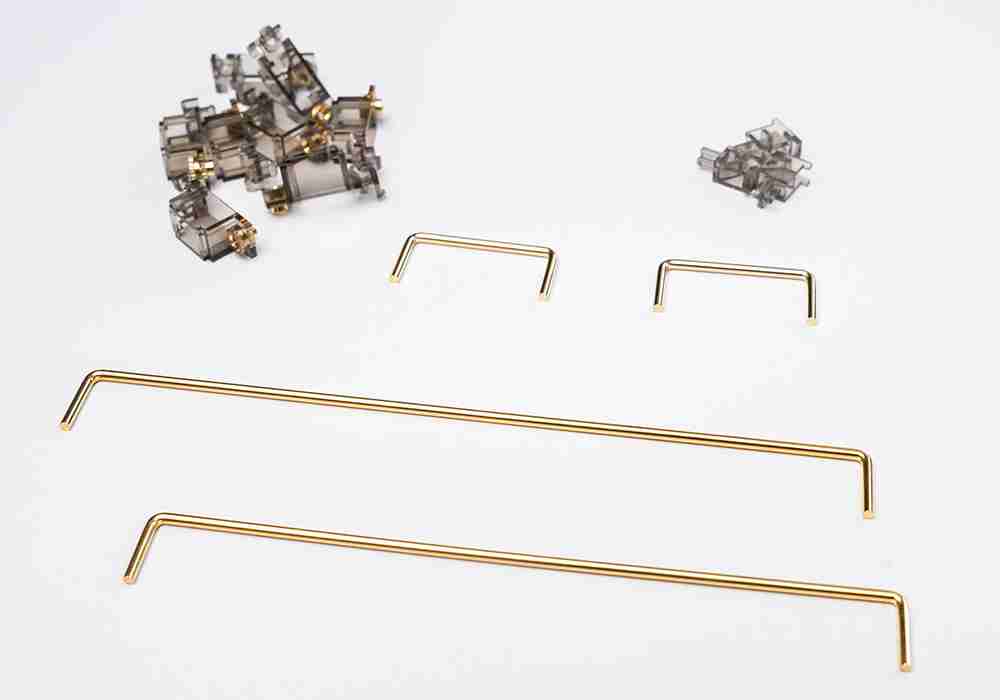
Diving deeper into the world of keyboard mechanics, let's familiarize ourselves with the two primary types of stabilizers: Cherry and Costar. These two types differ in their design and method of stabilizing larger keys.
Cherry Style Stabilizers
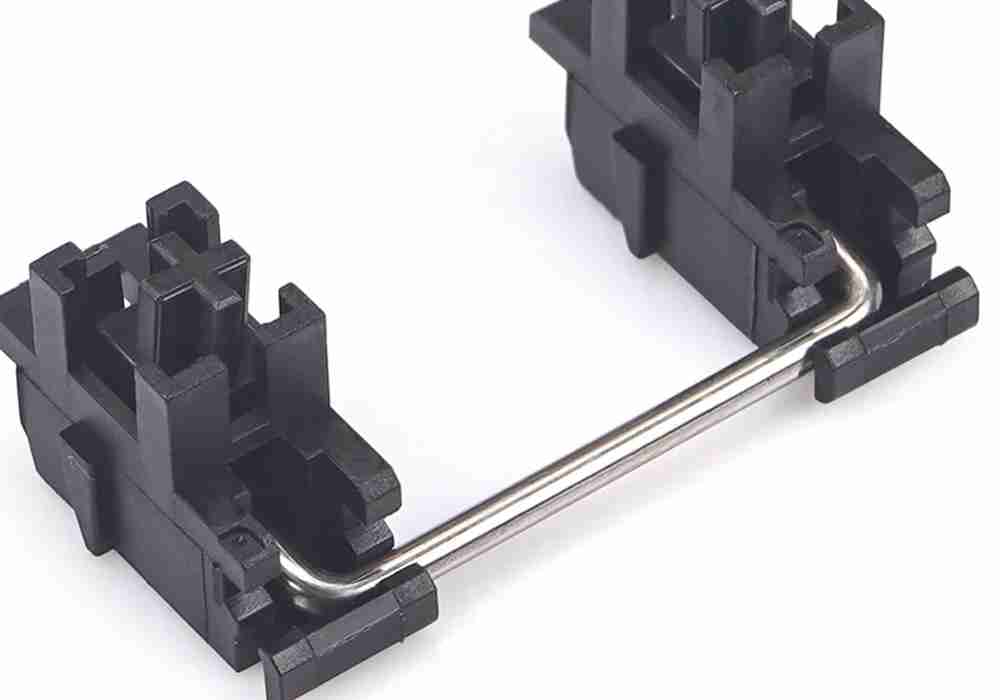
Design: Cherry-style stabilizers use a plastic clip mechanism to stabilize the larger keys. They are named after the Cherry MX switches, which are popular in mechanical keyboards.
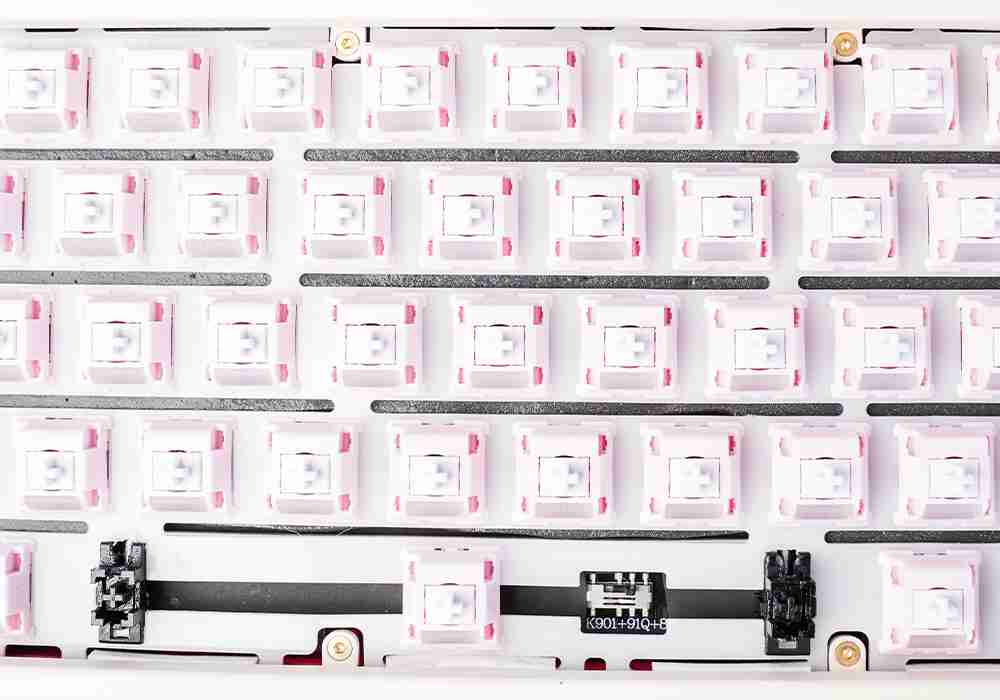
Operation: The stabilizer consists of two parts: the keycap insert and the stabilizer housing. The keycap insert clips onto the bottom of the keycap stem, while the stabilizer housing is attached to the keyboard's PCB. When a key is pressed, the stabilizer housing guides and supports the keycap's movement, preventing wobbling and ensuring a consistent keypress.
Advantages
Easier to work with and replace.
Keycaps can be removed and replaced more easily.
Disadvantages
Some users find that Cherry-style stabilizers can feel slightly mushy compared to Costar-style stabilizers.
Lubing can be more challenging due to the complex design.
Costar Style Stabilizers
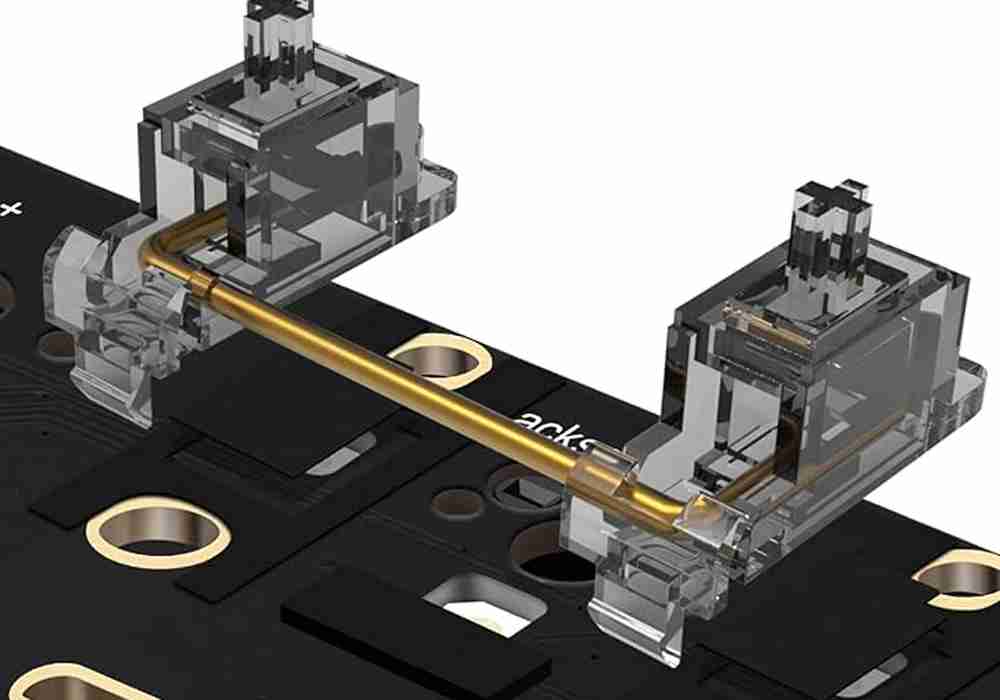
Design: Costar-style stabilizers, also known as wire stabilizers, use a metal wire to stabilize the larger keys.
Operation: A metal wire runs horizontally beneath the keycaps, connecting them together. The keycap itself has holes or slots where the wire is inserted. When a key is pressed, the wire ensures that the movement is even across the keycap, minimizing wobbling and providing a more consistent keypress.
Advantages
Often considered to provide a more satisfying and stable keypress feel compared to Cherry-style stabilizers.
Lubing is generally easier because there are fewer components involved.
Disadvantages
Keycap removal and replacement can be a bit more challenging due to the wire connection.
Common Stabilizer Issues
Common stabilizer issues in mechanical keyboards can lead to an unsatisfactory typing experience and may include the following problems:
Rattling stabilizers: Stabilizers are meant to prevent keys from wobbling excessively, but if they are not well-lubed or adjusted properly, they can produce rattling sounds when keys are pressed. This can be distracting and reduce the overall quality of typing.
Mushy key feel: When stabilizers are not lubricated adequately, key presses on larger keys can feel soft, mushy, or less crisp. This mushiness can affect the tactile feedback and overall typing experience, making it less satisfying for users who prefer a more distinct feel.
Key binding: In some cases, poorly adjusted stabilizers can cause key binding issues. This means that a key might not return to its default position after being pressed, leading to inconsistent or stuck keys.
Inconsistent keypress actuation: Stabilizers should ensure that keypresses register consistently, regardless of where on the keycap you press. However, if the stabilizers are not properly aligned or maintained, you might experience variations in actuation force or the point at which the key registers, leading to an uneven typing experience.
Difficulty in keycap removal/replacement: Depending on the stabilizer type, removing and replacing keycaps on keys with stabilizers can be a bit more challenging. This can deter users who want to customize their keycaps or perform maintenance on their mechanical keyboard.
Stabilizer rattle or squeak: Sometimes, stabilizers can produce squeaking or high-pitched noises when the key is pressed. This can be due to friction between the stabilizer components and may be a result of insufficient lubrication.
Inadequate key support: Some stabilizers may not adequately support the keycap, especially on the corners or edges of larger keys. This lack of support can lead to uneven keypresses and a less stable typing experience.
Mechanical keyboard enthusiasts often turn to modification techniques such as lubing, band-aid modding, clipping, and using higher-quality stabilizer components to address these common stabilizer issues.
Modding Stabilizers with Band-Aid
You might be wondering, what's a Band-Aid mod? It's a simple yet effective way of modifying your stabilizers to improve your keyboard's performance.
Let's get into the nitty-gritty of applying this mod, and unpack its benefits.
What is a Band Aid Mod
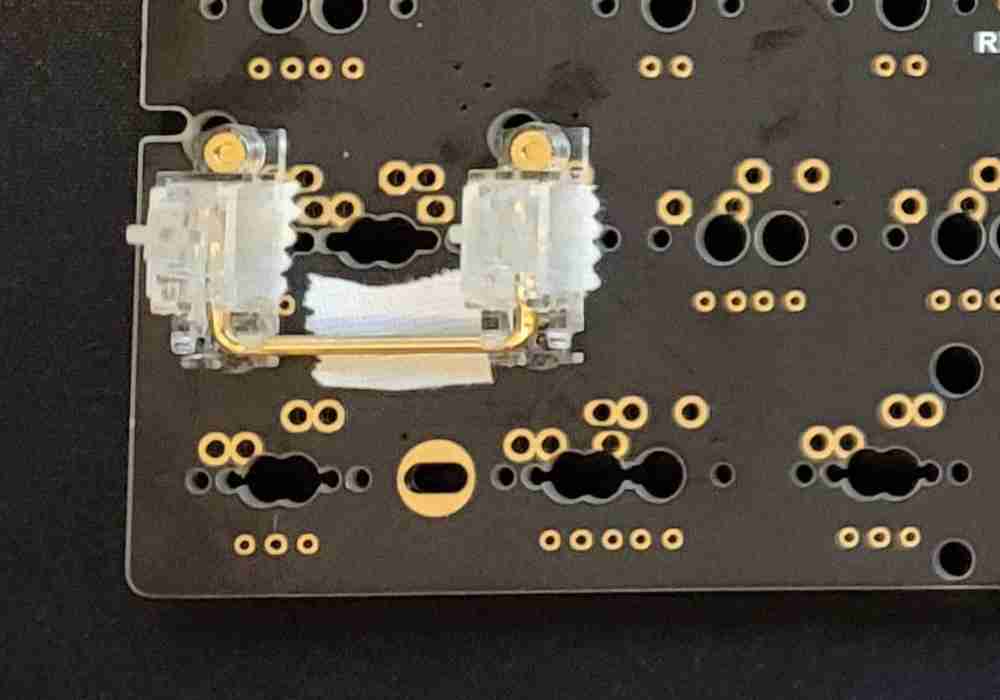
The Band-Aid mod is a stabilizer modding technique used by mechanical keyboard enthusiasts to improve the feel and sound of keypresses, particularly on larger keys with stabilizers. It involves applying a layer of cushioning material, typically a small piece of soft material like a small section of a Band-Aid, between the keyboard's PCB (printed circuit board) and the key switches.
It's an innovative, low-cost method that dramatically improves your typing experience. You'll need to cut the Band-Aid to fit the stabilizer housing, ensuring it covers the spot where the stabilizer bar hits. Once adhered, you'll apply lube on top for smooth movement.
Step-by-step Guide to Applying the Band-Aid Mod
Here's how the Band-Aid mod works
Preparation: To perform the Band-Aid mod, you'll need to open up your mechanical keyboard to access the PCB. This typically involves removing the keycaps and the top keyboard plate to expose the PCB.
Cutting the material: Take a small piece of soft material like a Band-Aid or a thin section of a soft, flexible material such as shelf liner, felt, or electrical tape. Cut it into a size and shape that matches the dimensions of the area where the key switches make contact with the PCB.
Applying the material: Gently place the cut material on the PCB where the key switches will make contact. It should be positioned so that when the key switches are pressed down, they come into contact with this cushioning material.
Reassembly: After applying the material, reassemble the keyboard by putting the top plate and keycaps back in place.
Benefits of the Band-Aid mod
Opting for the Band-Aid mod on your keyboard's stabilizers offers numerous benefits that'll significantly enhance your typing experience. For its simplicity, it's a game-changer. It's a simple and reversible modification that can improve the typing experience on a mechanical keyboard.
Reduces Noise: The cushioning material dampens the impact of the key switches when they bottom out, reducing the noise generated during keypresses. This can make the keyboard quieter and less clacky, which is especially useful in office or shared workspace settings.
Enhances Key Feel: It can also slightly alter the feel of the keypress, making it feel softer and potentially more comfortable for some typists.
Protects the PCB: The mod provides a layer of protection to the PCB by preventing the key switches from directly impacting it, potentially reducing wear and tear over time.
Use a minimal amount of cushioning material to avoid altering the keypress too significantly; you can always add more.
Modding Stabilizers by Clipping
Let's turn to the clip mod, another effective process for stabilizer modification. Here, you'll be guided through a step-by-step method to carry out the clip mod on your stabilizers.
What is the Clip Mod
The clip mod is a modification technique used to enhance the performance of stabilizers. The clip mod involves snipping off extra plastic from the stabilizer's legs to shorten their travel distance to the PCB.
It's a simple yet innovative approach to optimizing your keyboard's performance
Step-by-step Guide to Performing the Clip Mod
So, how exactly do you perform the clip mod on your keyboard's stabilizers?
Keycap and switch removal: Remove the keycaps and switches with stabilizers using a keycap puller and a switch puller respectively.
Clipping: Clip the extra plastic legs off the stabilizer insert, right at the bottom part of the stabilizers. Use a flush cutter to clean off excess plastic. This prevents them from hitting the PCB, eliminating the mushy bottom-out feeling.
Lubing: Apply lube to the stabilizer housing and the metal bar, ensuring a thin, even layer.
Stabilizer reassembling: Reassemble the stabilizers, making sure they move smoothly.
Reinstalling: Reinstall the switches and keycaps.
Advantages of the Clip Mod
With the clip mod under your belt, you'll instantly notice an enhanced keyboard performance, devoid of that annoying, mushy feel when you bottom out on larger keys. This mod ensures a smoother, more consistent keystroke, and a more satisfying tactile feedback.
The clip mod provides several other benefits:
Reduced Key Wobble: The clips help reduce lateral movement or wobble of the keycaps, ensuring that they remain stable when pressed off-center. This leads to a more consistent and satisfying typing experience.
Improved Keypress Stability: By providing extra support to the keycaps, the clip mod can make keypresses feel more stable and less prone to tilting or shifting during typing.
Quieter Operation: In some cases, the clip mod can also help reduce noise by minimizing the wobbling and rattling that can occur when larger keys are pressed.
Enhancing Stabilizers with Lube
You're ready to move on to the next step: enhancing your stabilizers with lube. This can drastically reduce any rattle and create a smoother keystroke.
Let's discuss why it's beneficial and how to do it properly.
Why Lube Your Stabilizers
Lubing refers to the process of applying a lubricant to the moving parts of the mechanical switches or stabilizers. Lubing is a popular modification among mechanical keyboard enthusiasts, and it can significantly improve the feel, sound, and overall performance of the keyboard.
Why should you consider lubing your stabilizers?
Lubricating your stabilizers reduces the friction between moving parts such as the key stem and housing in individual switches or stabilizers. Done properly, this reduces friction and enhances the keystrokes' smoothness. It eliminates the irritating rattling sounds that can disrupt your concentration. The keypress becomes smoother, quieter, and potentially more consistent.
How to Properly Lube Your Stabilizers
Lubricating stabilizers is a relatively simple process. Learn the proper method to enhance them with lube.
Preparation
Turn off or disconnect your keyboard, and remove the keycaps on the keys with stabilizers. You can use a keycap puller to do this.
Access the stabilizers by removing any layers or parts of the keyboard necessary to reach them. Depending on your keyboard model, this may involve removing the top plate or simply exposing the stabilizers.
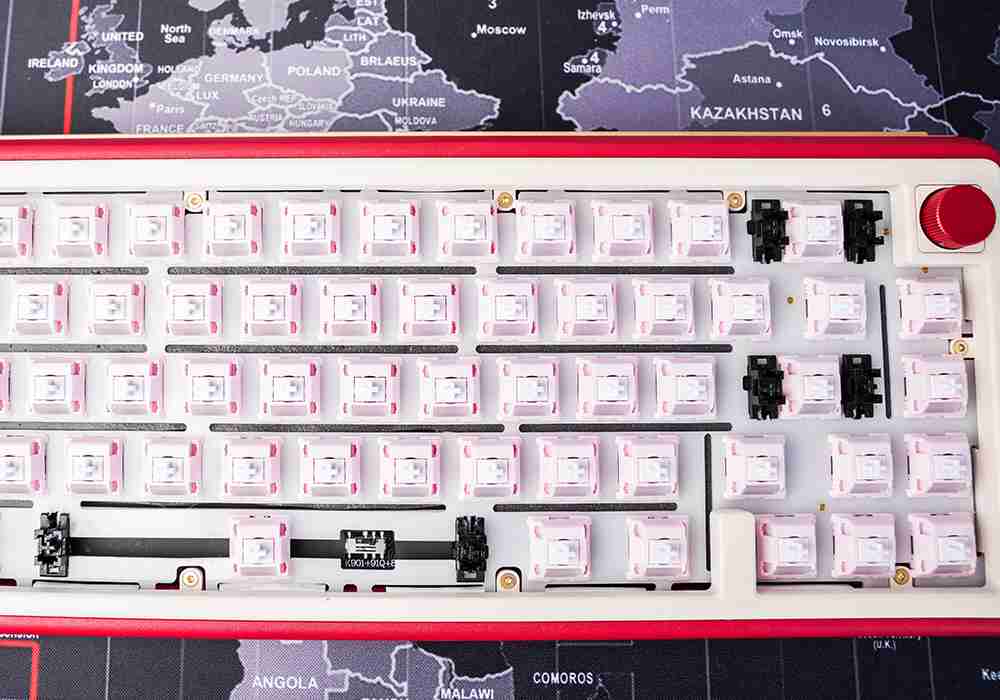
Identify Stabilizers
Locate the stabilizers on the larger keys, such as the spacebar, enter key, shift keys, etc. They will have plastic or metal components that connect to the keycaps.
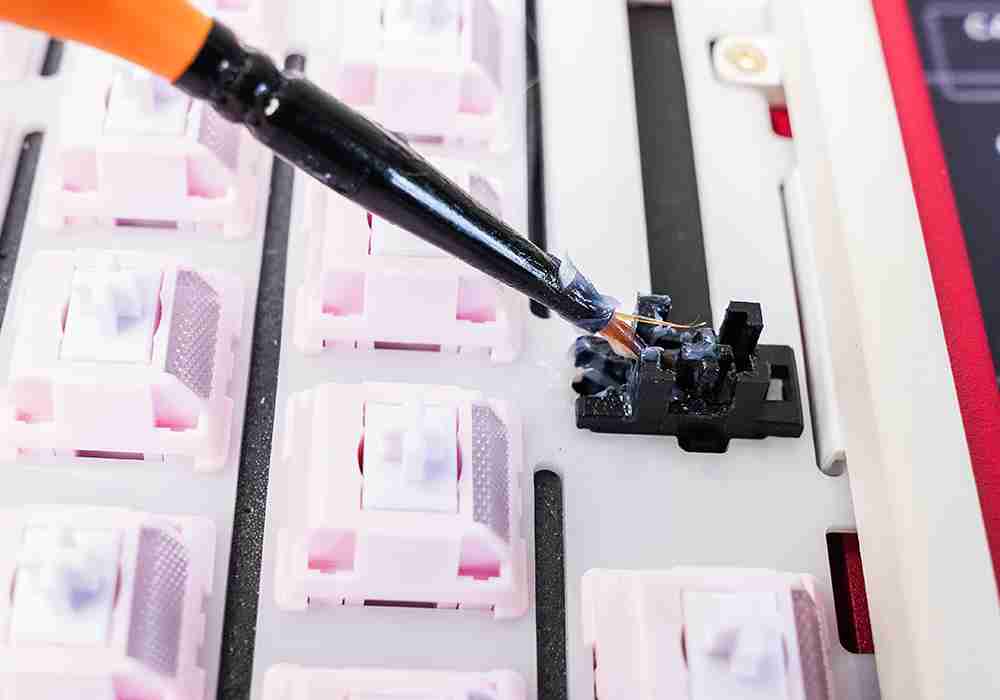
Apply Lubricant
With a brush or applicator, apply a small amount of lubricant to the moving parts of the stabilizer. Focus on areas where friction occurs, such as where the stabilizer clips contact the keycap or the wire contacts the stabilizer housing.
Ensure the lube is applied evenly and sparingly, as over-lubing can lead to other issues, such as mushy keypresses or difficulty in keycap replacement.
Avoid getting lubricant on the key switch, as this can affect switch performance.
Spread Lubricant
Move the stabilizer components around (actuate the key a few times) to help evenly distribute the lubricant.
If you've removed the keycaps, make sure to actuate the stabilizers with the keycaps back on, as the lubing may need to accommodate the extra height of the keycaps.
Reassemble
Reassemble your keyboard by putting back any layers or parts you removed to access the stabilizers.
Replace the keycaps, ensuring they are aligned correctly.
Testing
Test your keyboard to ensure the lubed stabilizers have improved the typing experience. Pay attention to the reduced noise, smoother keypresses, and enhanced stability.
Alternative Stabilizer Mods
You're not limited to band-aid, clip, and lube mods; there's a whole world of creativity out there waiting for you. Let's delve into some alternative stabilizer mods you might want to consider for further enhancing your keyboard's performance.
Stem swap: This mod involves replacing the stems of your stabilizers with stems from a different set of stabilizers, which may be more to your liking in terms of feel and sound. It's a more advanced mod, and you need to ensure compatibility with your keyboard.
Custom stabilizers: Some companies produce custom stabilizers specifically designed to address common issues with stock stabilizers. These may include upgraded materials and designs for reduced wobble, smoother keypresses, and less noise.
Tape mods: This is a simple mod where you apply a thin layer of tape or soft material on the keyboard PCB before reassembling it. The tape helps dampen noise, especially from stabilizers, and provides a softer landing for keypresses.
Lube-tuning: In addition to simply applying lubricant, enthusiasts may experiment with different types and brands of lubes to fine-tune the feel of the stabilizers and switches to their preferences. This can be a subtle but impactful mod.
Screw-in stabilizers: Traditional stabilizers are plate-mounted, but screw-in stabilizers can be a better alternative, as they offer increased stability, less wobble, and an overall improved typing experience. Installing them may require modifying your keyboard's PCB.
Tuning with O-rings: O-rings are small rubber rings that can be placed around keycap stems to dampen the sound and feel of the keypresses. While this doesn't directly impact stabilizers, it can enhance the overall typing experience.
Modding stabilizers is all about experimentation. Try new things and push the boundaries. Who knows? You might create your own mod to revolutionize keyboard performance!
Conclusion
You've done it! With these simple tweaks, your keyboard game is now on a whole new level. The band-aid, clip, and lube mods not only improve your typing experience but also enhance your keyboard's sound quality.
But beyond these specific modifications, what we've truly delved into is the joy of making your mechanical keyboard your very own. These mods represent just the beginning of what's possible. Keep exploring, keep modding, and don't forget to enjoy every typing---or gaming---moment on your dream keyboard.
Chris Greiner, a Mechanical Keyboard specialist, boasts a solid educational background with dual bachelor's degrees in Computer Science and Business Management from Lewis University. His additional certification in Mechanical Keyboard Design showcases his dedication to staying on the forefront of keyboard technology. Chris primarily writes for keyboard enthusiasts and has been featured on platforms like Jestik, solidifying his reputation as a thought leader in the mechanical keyboard community.
Pinstack is a dedicated online media platform focusing on selling and reviewing mechanical keyboards. Our commitment is to provide comprehensive reviews, in-depth guides, and much more. With our active presence on YouTube and our website, we strive to deliver top-quality content across multiple platforms, aiming to bring the best to our audience.
Subscribe to our newsletter
We care about the protection of your data. We’ll never share your details.
Pinstack is an Amazon Affiliate. All earnings from this website are from qualified purchases. Learn more about our affiliate disclosure terms.